
Illustration workflow
Anatomy: from an interactive figure to a video scene
Convert an interactive explanation into a planned viewing sequence.
An interactive object and a video solve different problems. The first lets a visitor choose what to inspect; the second chooses a path for the viewer. This guide uses Anatomy’s official examples to explain that transition and proposes a small, testable video workflow. It does not present MP4 export as an Anatomy feature.
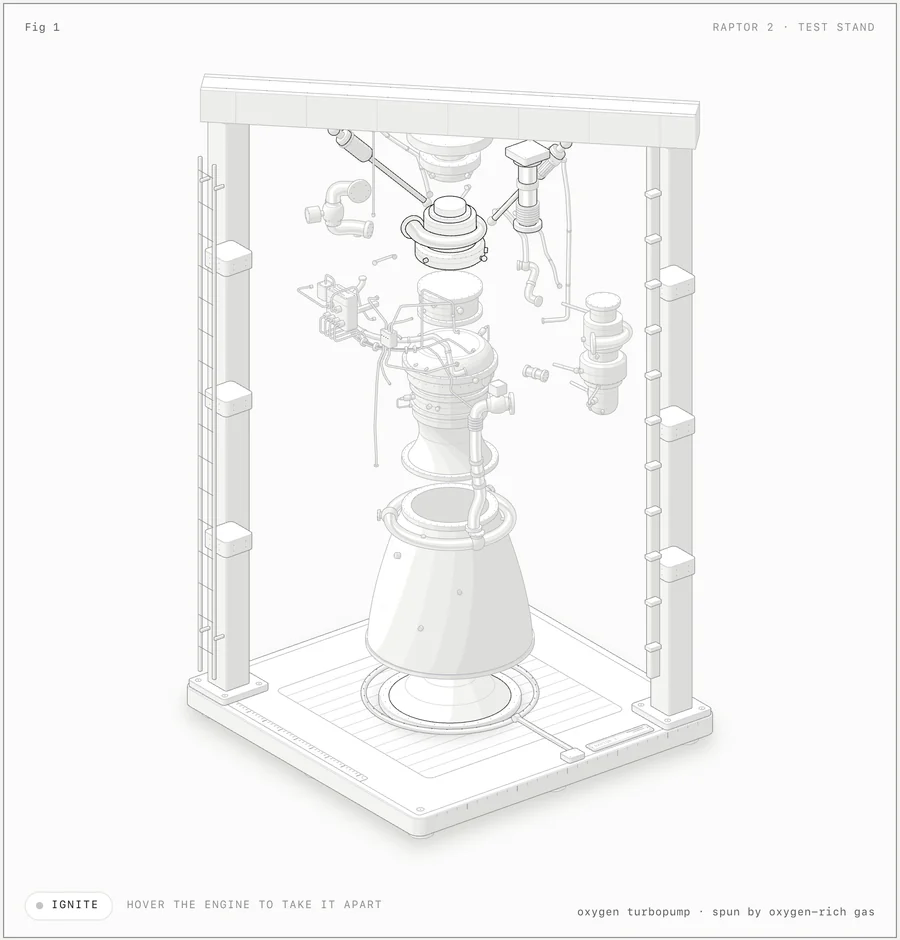 SVG + WebGL
Hover to separate 11 assemblies. Focus the figure, press I to ignite and Esc to reassemble.
Original examples by the author, not generated by Hermes. Ryan / Anatomy · MIT ↗
What to know before you begin
Make the mechanism visible
Anatomy specializes in detailed isometric illustrations using SVG with optional WebGL and 3D effects. It is a good starting point for a machine, a cache or a process. Ask for the output format your project needs and verify the labels against a reliable reference.
Replace interaction with a story
The following is our proposed workflow, not an Anatomy export feature. List the states a viewer must see: the whole object, the active component, the path of a signal and the final result. Assign a time range to each. Remove any dependency on a viewer clicking at the right moment.
Prove that export works early
Move a small scene into your renderer and export a short test. Check transparency, fonts, shader output and labels at the delivery resolution. Only extend the scene once repeated exports show the same state at the same timestamp.
THE COMPLETE WALKTHROUGH
From input to delivery, step by step
01Choose one question the object should answer
Do not attempt to explain every assembly in a dense engine at once. For a cache example, choose a single question such as “what changes on a miss?” Write the initial state, the input and the final state in ordinary language before assigning any times.
02Record the interaction as data
List the actions a visitor would normally trigger: focus a component, press a control, separate an assembly or reset the device. Give each action a timestamp. This becomes the script that drives the scene when no viewer is there to click.
03Separate the model from the camera
The camera may move closer while the mechanism remains unchanged. Keep those as separate controls. If a camera move also restarts the simulation, repeated captures may produce different results. Test the final pose without the camera move before combining them.
04Give important states a pause
Hold the complete object before separating it, and hold the active component before changing it again. An exploded view is useful only if the viewer has time to relate the parts. Keep explanatory text outside the machinery and link it to the current state.
05Test one transition at the final resolution
Export only the change from assembled to separated, or from idle to active. Inspect geometry, shader output, edge sharpness and font loading in the actual file. If this small slice fails, a longer render only makes the failure more expensive to diagnose.
A 12-second explanatory sequence
Use this editorial plan as an editable working document, adapting it to the actual assets and placement.
| Time | Scene state | Viewer task |
|---|---|---|
| 0–3 s | Complete object, resting pose | What is this mechanism? |
| 3–6 s | Isolate the active assembly | Which part matters now? |
| 6–9 s | Trigger one meaningful input | What changes and why? |
| 9–12 s | Hold the result and readout | What should I remember? |
A complete request to adapt
This is an original example for this tutorial. Replace the placeholders with your task and retain the preparation, review and delivery requirements. Ask the agent to identify missing inputs before production.
Take this existing Anatomy HTML figure and plan a 12-second explanatory sequence. Preserve the mechanism. Define initial state, timestamped inputs, camera state and readout for every beat. Replace pointer-only actions with a replayable event list. Keep a still fallback. First show the timeline table, then prove that two seeks to the same timestamp give the same pose. Only after that, integrate the chosen video renderer.Where the process can get stuck
Can I simply screen-record it?
Yes, for a rough demonstration. Revisions are easier when the same inputs can be replayed at the same times. Save the event sequence even if the first delivery is a recording.
The shader disappears in the export
Check the rendering environment on a small scene and keep the SVG fallback visible. Verify transparency and WebGL support before constructing the full sequence.
The video feels busy
Remove one type of motion at a time. Try a fixed camera and one active assembly. If the explanation becomes clearer, keep that simpler structure.
APPLY IT TO YOUR PROJECT
Finish one small, reviewable output
Walk through the process with your own inputs. Save the first output and specific review notes: what works, what needs changing and how to reproduce it. Once the small test passes, extend the duration, complexity and delivery variants.
References & editorial notes
Consult the original projects for current capabilities, eligibility and setup. Exercises, timings, sample requests and review advice are Hermes editorial work. Creator outputs and teaching illustrations are labeled where shown.